2.19.2015

Modern String Art


This is totally a 4th grade project.  AND, it looks fabulous on my wall.  String art.  Not only does it add color, but it ads texture, which adds interest.  You could do a heart, a letter, a bird, a tree...whatever your little heart desires.

Materials needed:

- Hammer
- String (usually found in the yarn section at your local crafty store, or perhaps on your hubby's workbench:)
- Wooden plank, etc.  I got mine at Hobby Lobby, in the unfinished wood section.
- Paint (optional) You can paint your wood thing or decoupage, etc.
- Nails.  I use 1" finishing nails
- Paper template
- Tape
- About 1 hour of time without kids, but you can add wine or beer.

Nails and String and Template


1.  If you want to paint or decoupage your wood plank, now
would be the time.  Please allow enough time to dry well.  Before painting, look on the back to make sure there's a way to hang the finished project.  If not, you'll have to make that happen.  Now...paint.

2.  Cut out a template.  I chose a heart as this was going on my living room wall as a part of my new gallery wall.  Using a scrap piece of paper, trace and cut out object.  It has to be an object that without definition, will still look like that object.  A letter is perfect, or a shape.  Something like an airplane might not work so well as it needs more definition to not look like a blob.  I

3.  Center the template on your wood and secure with tape (under template).  It's okay if you don't want to measure. I didn't.

4.  Hammer nails into wood surrounding template.  They don't need to be in super far, just stable.

5.  Take your string and tie one end on a nail, leaving about 5" of tail for tying off later.

6.  This is where the fun begins!  You can take your template off now.  Start by making an outline 2 times around the perimeter of the object.  Each time you come to a nail, wrap the string around it and go to the next.  It is VERY important that the outline is done a special way.  When moving from one nail to the next, always wrap the nail in a clockwise motion.  This forms a very neat line.  Keep your string taught as you wrap the entire time.

7.  Now you can move onto randomly wrapping the nails.  Sometimes I wrap twice on each nail.  Move around and fill up your space!  Occasionally, you'll have to push some of the string down the nails so you have room to keep wrapping.

8.  How do you know when to stop?  You stop when you like how it looks.  It's all up to you.  Finish up by tying it off at the starting point.  Done!!!  Sit back and admire your craftiness!!


There are lots of ways you can make this your own with colors and design.  Have fun!!

~Jayna

2.18.2015

Peaches & Butterflies


You can't get too far into a boutique these days without the soothing images of corals, peaches, mint and aqua.  I have personally fallen head over heels for the combo.  Adding metallic gold to the mix is like adding a cherry to an already gorgeous sundae.

This is the Winged Collection from Art Gallery Fabrics.  Fabric designer Bonnie Christine includes this collection in her stunningly vast array of fabric creations.  I'm not quite sure how a pastel can be bright and soothing at the same time, but she's done it here.


Thank you to my wonderful customer who sent me a few pictures of her bedding made with these gorgeous fabrics.  Bedding made by RockyTop Design.  Custom made children's bedding and other home decor pieces.

Flutter away, butterfly!

-Jayna

2.17.2015

Coffee Table turned TV Stand


I haven't painted many pieces of furniture, but I'm always so pleased with the results.  We bought a new TV and therefore, needed a new TV stand.  I couldn't bring myself to buy something new, so I went in search of something that would work from Craigslist.  Found it.  Gorgeous and in perfect condition, this coffee table was to be the new TV stand.

Fresh off of Craigslist

I started with spray primer.  After doing some research, I decided to use the Kilz brand spray primer.  I did a bit of light sanding first, then I wiped clean with water.  After drying, I used the spray primer on it, until it was almost white.

Primer added


After drying overnight, the next morning I bought an antique white spray paint.  I almost used a roller and paint, but I just didn't have it in me to get all of that out.  Rustoleum was the winning brand here. Nice, light, even sweeps when spraying.  I put some fans on it and let it dry for another 5 hours before I went over it with a 2nd coat of the antique white color.  Paint takes longer to dry when it's cold.  After the second coat, I allowed it to dry overnight.

The top of the TV stand is where I was torn.  I thought about painting the whole thing antique white and then distressing.  I also thought about using a bright turquoise for the top.  I had that spray paint already but I couldn't figure out how to cover the rest of the table well enough to use spray paint on the top only.  I seriously didn't have time to waste on that.  I finally reached into my extensive collection of paint in a can and found the perfect shade of light, celery green.

I used a brush and it worked great.  I had my mind set on distressing after drying, but I just loved the look of the table without it.  I'm not into the whole 'shabby chic' look anyway, so I went for the 'brand new' look.  Hot damn.  This table turned out gorgeous.

Paint Finished!

I always like to finish up with a thin coat of Polycrylic.  You can get that in the wood stain section in the hardware store.  It adds a bit of sheen, but mostly just protects it from fingerprints and scuffs, etc.

I finished it off with a new gallery wall.  I scored gray/silver baskets at TJ Maxx.  Love it.


My advice, don't be afraid of trying this.  Always make sure to let the paint dry well in between coats and keep away from flying dust, etc.  You've got this!!


-Jayna

2.16.2015

Metallic Pillows

I just had to quickly share these wonderful coral, aqua and metallic gold pillows I found the other day. Target. That's right, I found them at Target.

 Loving these geometric shapes and soft metal prints. Anyway, thought I would share. Soon to be on sale, I'm sure:)

Have a great day!
Jayna


Valentine Ring Bling


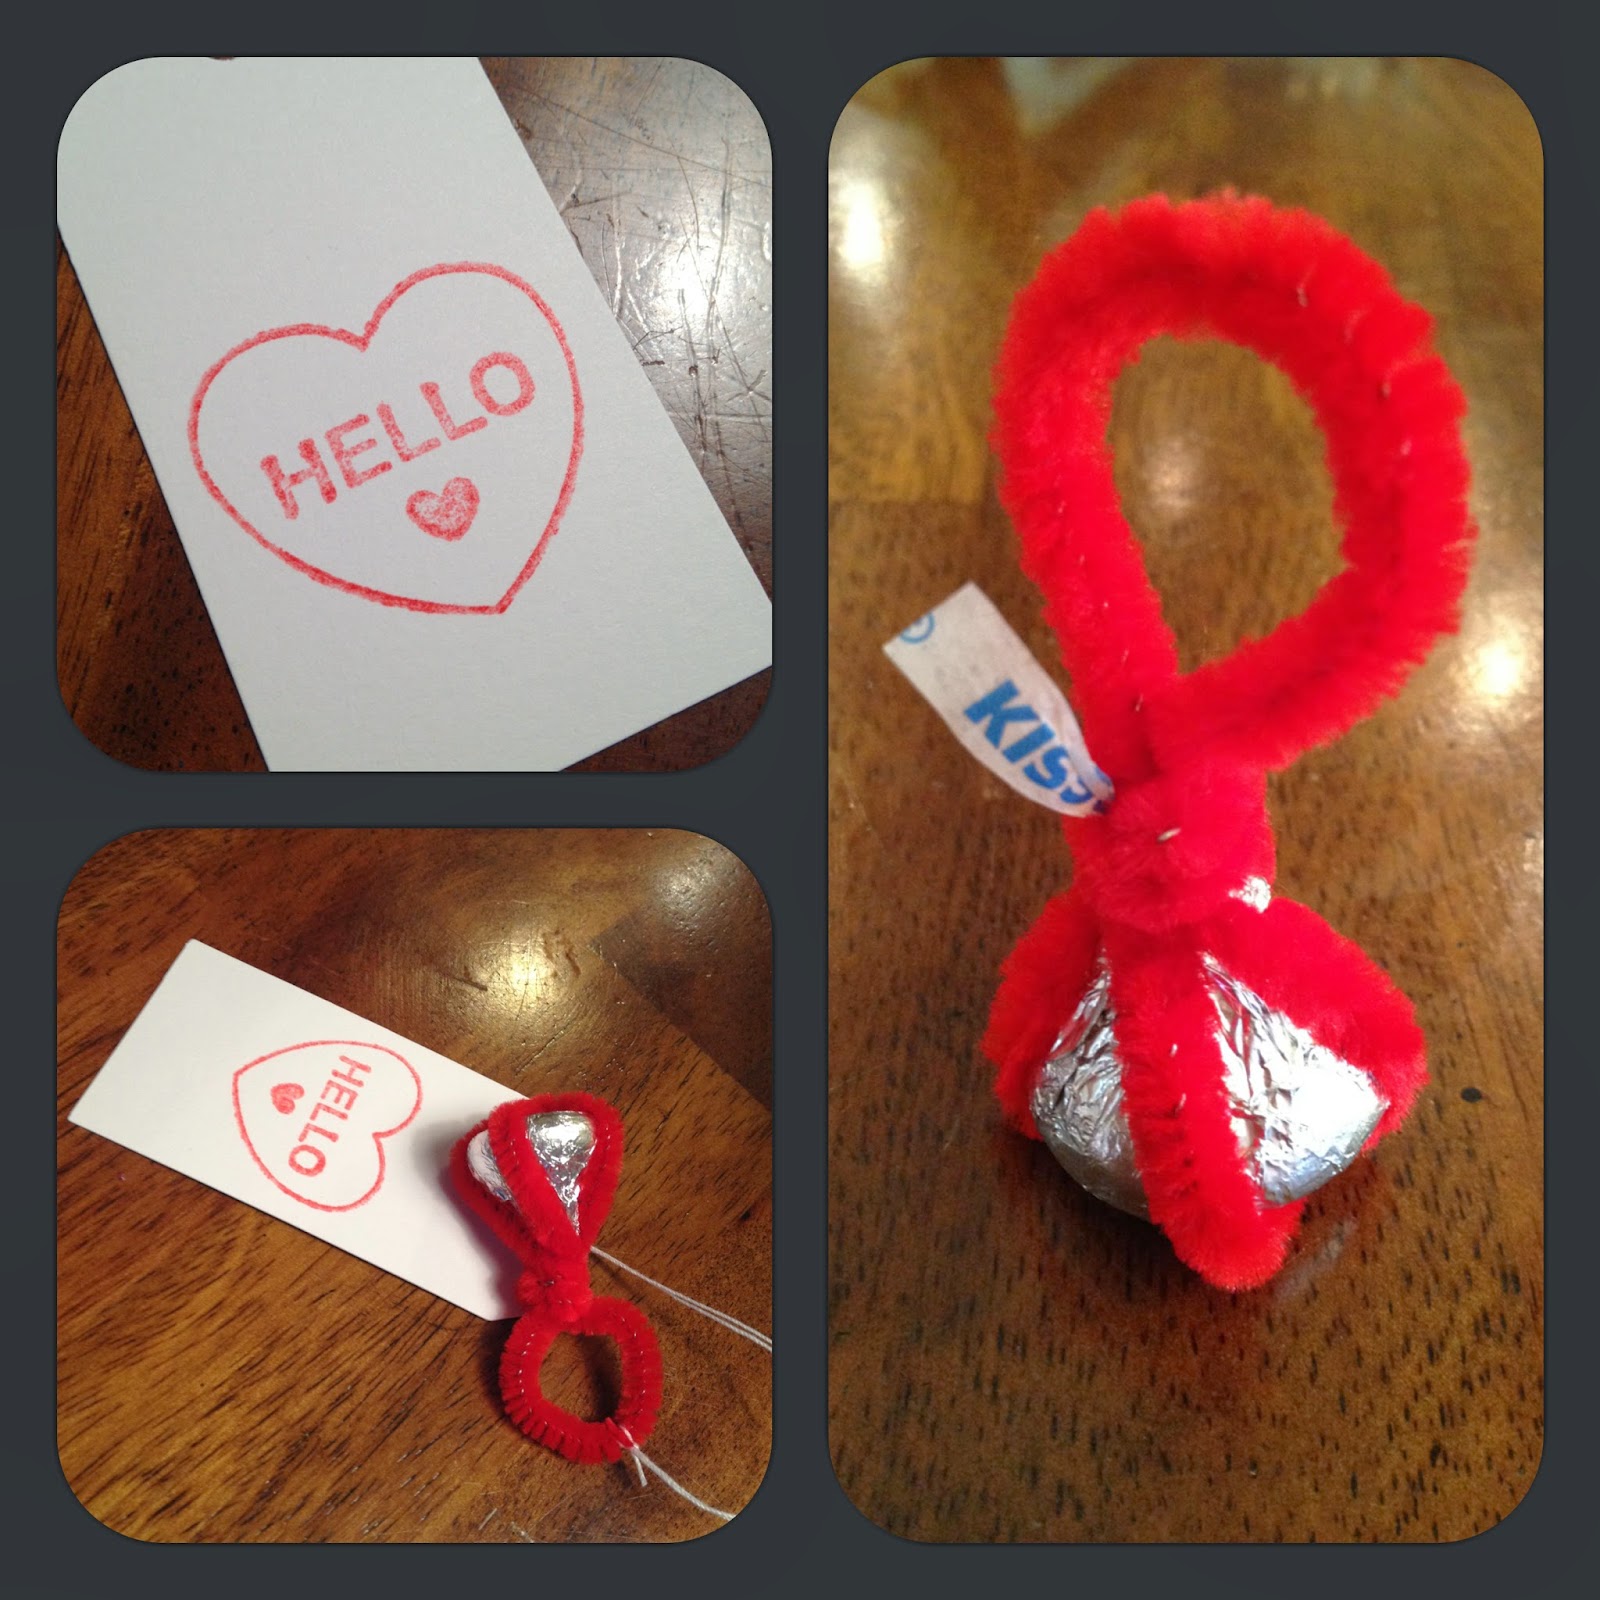
Every year, my quest is to find a Valentine project that is simple and affordable.  I have 3 children in school now, so even a simple Valentine adds up when multiplied by 75! Enter, the chocolate ring bling.  Simple and very affordable. Perfect for our busy household.

Supplies:

Bag of Hershey Kisses (one kiss per Valentine)
Bag of Red pipe cleaners (one pipe cleaner per Valentine)
String or yarn of some kind
Tags (I purchased pre-cut tags in the scrapbook section, but you can cut your own)
Pen (I used a pretty paint pen that I already owned)


  1. Take out one pipe cleaner and cross the two ends, as shown below. Give one or two twists.
  2. Place the Kiss flat side down on top of the twisted part.

3.  This is where I pic up both pieces and make sure the crossed part of the pipe cleaner is centered on the kiss.  Now bring all 4 pieces up and holding securely at the tip of the Kiss, twist.  I do this a few times and then wind around the sharp ends that remain.  Try to get those hidden as they can be sharp.  Put the ring on your finger to shape.  If it needs to be smaller, a few more twists will work.

4.  I purchased a stamp for the tags, but you don’t have to, or can add a sticker or some other prettiness.  Then, tie the tag onto the ring, fill out the To and From and you’re done!


After you've tied some string onto the tag and then onto the ring, special care should be given to these so they don’t tangle.


Great for teachers and children alike.  Happy Valentine’s Day!!

Jayna